Introduction to Buckeye Brownies
What Are Buckeye Brownies?
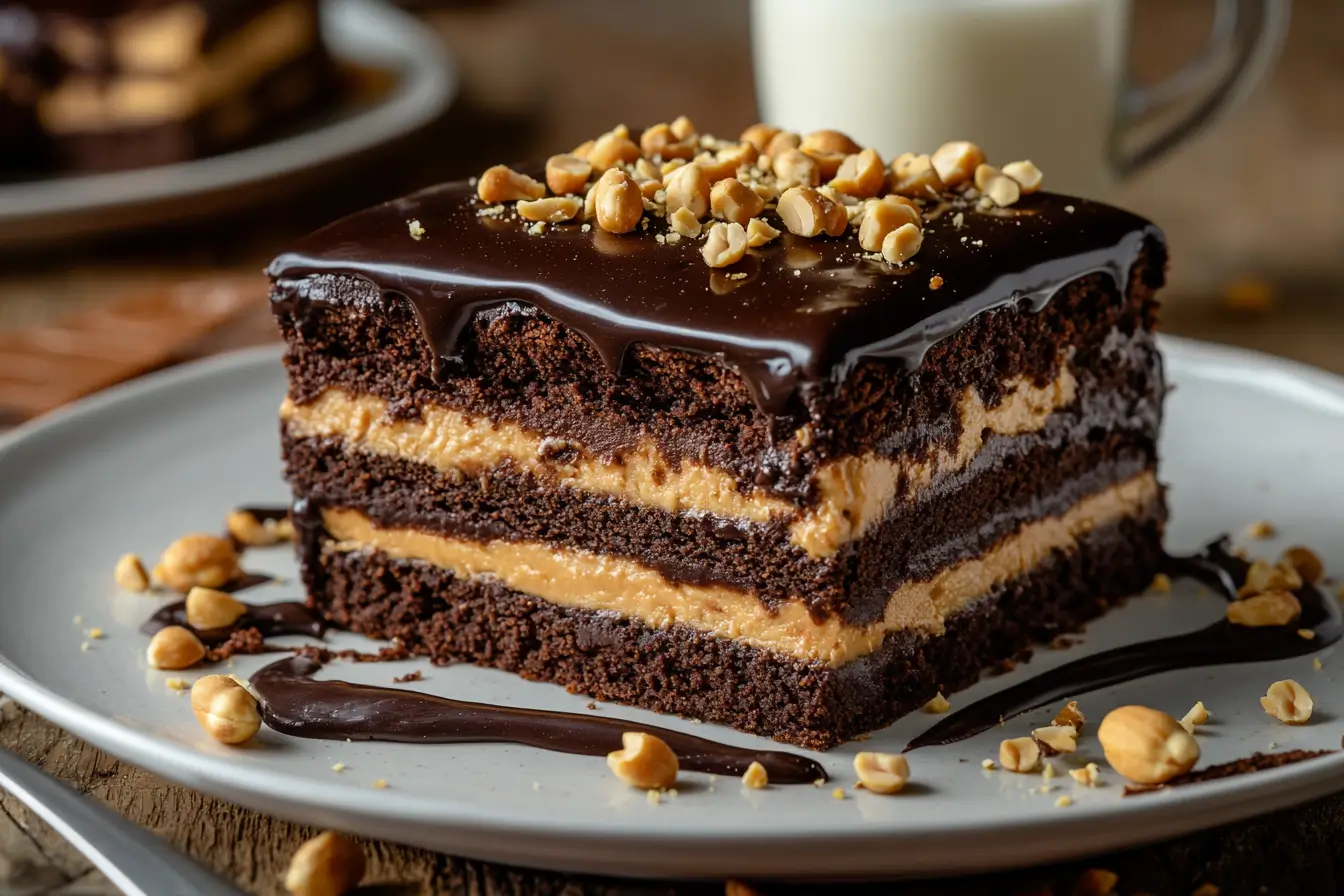
Buckeye brownies are an indulgent dessert that fuses the rich, fudgy texture of classic brownies with a creamy peanut butter layer, topped off by a smooth, glossy chocolate ganache. The combination perfectly captures the iconic flavor profile of buckeye candies, which are made of peanut butter balls dipped in chocolate to mimic the appearance of Ohio buckeye tree nuts. The decadent layers of buckeye brownies not only deliver the familiar taste of this beloved confection but also elevate it into a shareable baked good.
The Origin of Buckeye Brownies
The term “buckeye” traces back to Ohio, where the state tree, the Ohio buckeye, produces nuts that bear a striking resemblance to a deer’s eye. These nuts inspired the creation of buckeye candies, a treat deeply rooted in the region’s culture and history. The popularity of this classic chocolate-and-peanut-butter combination eventually gave rise to buckeye brownies, which bring the iconic flavors into a new and irresistible form. This layered dessert has become a favorite for gatherings and celebrations, cherished for its perfect balance of flavors and textures.
Ingredients and Equipment
Essential Ingredients
Brownie Base:
- Unsalted butter – Adds richness and moisture.
- Granulated sugar – Provides sweetness.
- Cocoa powder – Creates the chocolate base.
- Eggs – Contribute structure and texture.
- Vanilla extract – Enhances flavor.
- All-purpose flour – Gives structure.
- Salt – Balances sweetness.
Peanut Butter Layer:
- Creamy peanut butter – Central flavor.
- Unsalted butter – Adds creaminess.
- Powdered sugar – Sweetens and thickens.
- Milk – Helps achieve a spreadable consistency.
- Vanilla extract – Complements peanut butter flavor.
- Pinch of salt – Balances sweetness.
Chocolate Ganache Topping:
- Semi-sweet chocolate chips – Ensure a rich, smooth topping.
- Heavy cream – Adds creaminess.
- Unsalted butter – Gives the ganache a glossy finish.
Recommended Equipment
- 9×13-inch baking pan – For even baking.
- Mixing bowls – To prepare each layer.
- Electric mixer – Ensures smooth mixtures.
- Saucepan – For melting ingredients.
- Offset spatula – Spreads layers evenly.
- Parchment paper – Prevents sticking and makes cleanup easier.
Step-by-Step Recipe

Preparing the Brownie Base
- Preheat the Oven
- Preheat your oven to 350°F (175°C).
- Line a 9×13-inch baking pan with parchment paper, leaving an overhang on the sides for easy removal.
- Melt Butter and Cocoa
- In a medium saucepan over low heat, melt unsalted butter until fully liquefied.
- Remove the pan from heat and stir in cocoa powder until the mixture is smooth and glossy. Set aside to cool slightly.
- Combine Wet Ingredients
- In a large mixing bowl, whisk together granulated sugar and eggs until light and well-combined.
- Add the cooled butter-cocoa mixture and vanilla extract, stirring until smooth.
- Incorporate Dry Ingredients
- Gradually sift in all-purpose flour and salt, folding gently into the wet mixture until just combined. Avoid over-mixing, as this can make the brownies dense.
- Bake the Brownie Base
- Pour the batter into the prepared baking pan, spreading it evenly to ensure uniform baking.
- Bake for 25–30 minutes, or until a toothpick inserted in the center comes out clean or with a few moist crumbs.
- Let the brownies cool completely in the pan before proceeding.
Creating the Peanut Butter Layer
- Mix Ingredients
- In a medium bowl, beat together creamy peanut butter and softened unsalted butter using an electric mixer until the mixture is smooth and creamy.
- Gradually add powdered sugar, followed by milk, vanilla extract, and a pinch of salt, mixing until the mixture is creamy and spreadable.
- Apply the Peanut Butter Layer
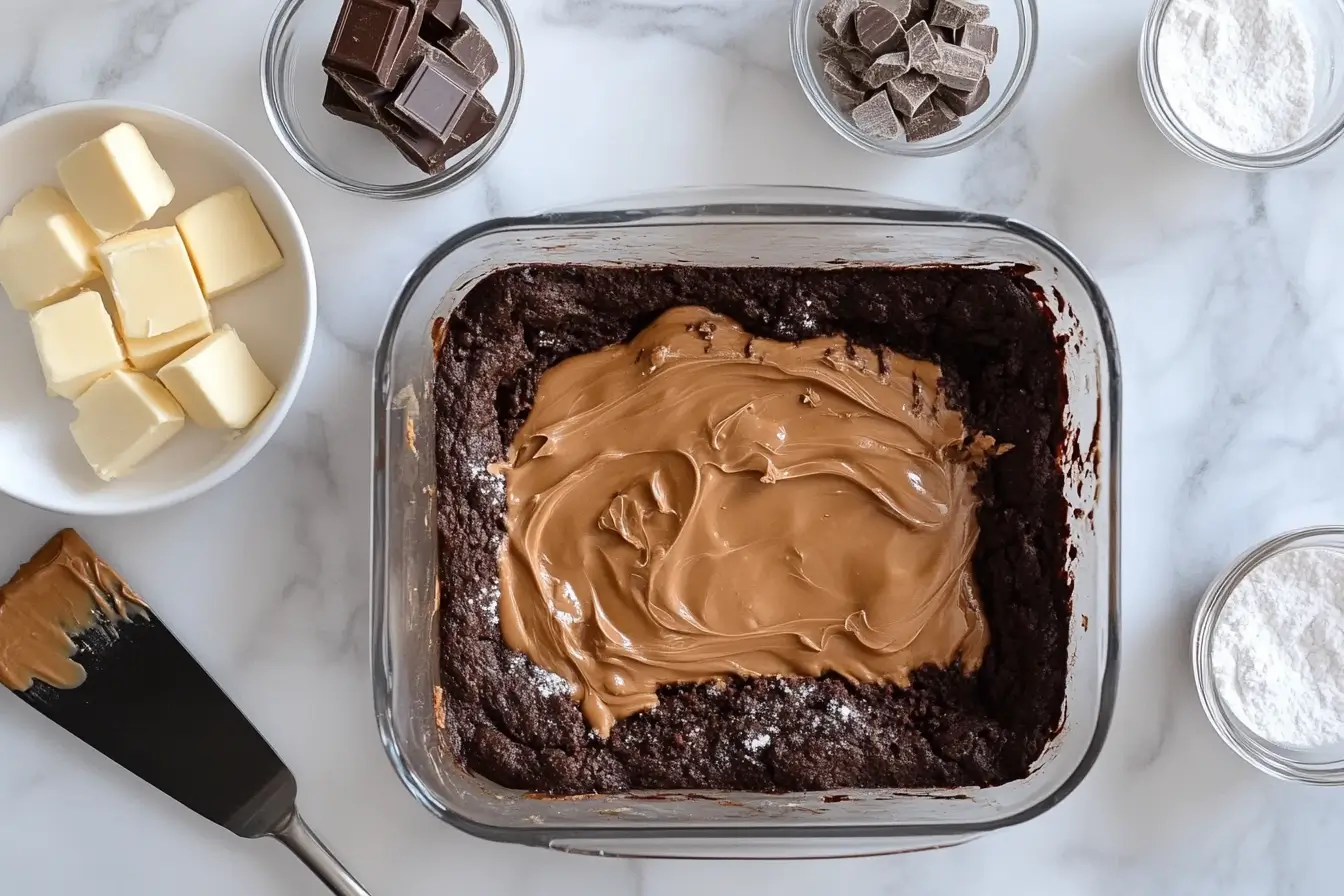
- Once the brownie base is completely cooled, spread the peanut butter mixture evenly over the surface using an offset spatula.
- Smooth the layer to create a flat surface, which will make it easier to add the ganache.
Preparing the Chocolate Ganache Topping
- Melt Chocolate
- In a microwave-safe bowl, combine semi-sweet chocolate chips and heavy cream.
- Microwave in 30-second intervals, stirring after each, until the chocolate is fully melted and the mixture is smooth and velvety.
- Incorporate Butter
- Stir in unsalted butter until completely melted and incorporated, giving the ganache a glossy finish.
- Top the Brownies
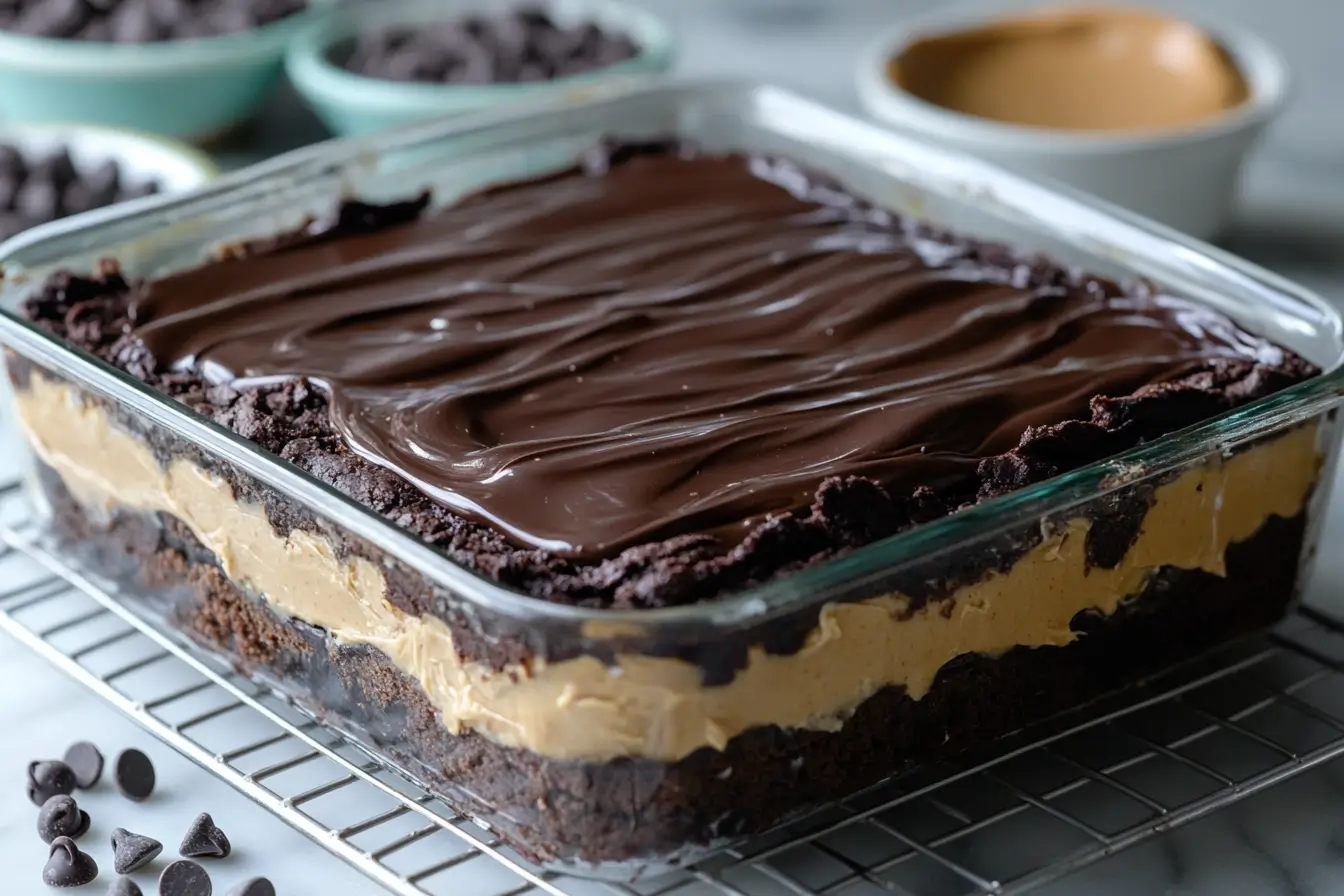
- Pour the prepared ganache over the peanut butter layer.
- Use an offset spatula to spread the ganache evenly, ensuring complete coverage.
- Set and Slice
- Transfer the pan to the refrigerator and let the brownies chill for at least 30 minutes, allowing the ganache to set.
- Once set, use the parchment overhang to lift the brownies out of the pan.
- Slice into squares or rectangles and serve.
These buckeye brownies are a show-stopping dessert, combining the richness of chocolate, the creaminess of peanut butter, and the elegance of a ganache topping. Perfect for parties or as a treat for yourself!
Baking Tips and Tricks
Achieving the Perfect Brownie Texture
- Measuring Flour Correctly
- For tender, fudgy brownies, it’s essential to measure flour accurately. Use the spoon-and-level method: spoon flour into your measuring cup and level it off with a straight edge. This prevents packing the flour, which can make the brownies dense and heavy.
- Avoid Over-Mixing
- After adding the flour to the wet ingredients, mix gently until just combined. Over-mixing activates gluten, leading to a tougher texture. To maintain a soft and tender crumb, stop mixing as soon as no streaks of flour remain.
- Perfect Baking Time
- Keep a close eye on the brownies while they bake. Over-baking can dry them out, while under-baking might leave the center too gooey. For best results, remove the brownies when a toothpick inserted near the center comes out with a few moist crumbs, not wet batter. The residual heat will help them set as they cool.
Enhancing Flavor
- Use Espresso Powder for Richer Chocolate
- Adding 1 teaspoon of instant espresso powder to the brownie batter enhances the chocolate flavor without imparting a coffee taste. This secret ingredient deepens the cocoa profile, making the brownies more indulgent.
- Don’t Skip the Salt
- A small pinch of salt in the peanut butter layer is key to balancing sweetness. It highlights the flavors of the peanut butter and chocolate, adding a subtle complexity to the dessert.
Additional Tips
- Line Your Pan Properly
- Lining your pan with parchment paper and leaving an overhang ensures easy removal. This prevents the brownies from sticking and makes slicing much simpler.
- Smooth Layers for a Polished Look
- Use an offset spatula for spreading the peanut butter layer and ganache. This tool helps create smooth, even layers, giving the brownies a professional finish.
- Chilling for Clean Cuts
- Refrigerate the assembled brownies for at least 30 minutes before slicing. This sets the ganache and peanut butter layers, making them easier to cut cleanly without smudging.
- Customize to Taste
- Add mix-ins like chopped nuts, chocolate chunks, or even mini marshmallows to the brownie batter for added texture and flavor.
By following these tips, you’ll ensure your buckeye brownies turn out flawless every time, with a perfect balance of textures and flavors that are sure to impress!
Variations and Dietary Considerations
Variations
- Nut Alternatives
- Switch out the peanut butter in the middle layer with almond butter or cashew butter for a unique twist on the classic flavor profile. These options pair just as well with chocolate, offering a slightly different nutty richness. For an extra special treat, try using hazelnut butter for a flavor reminiscent of chocolate hazelnut spread.
- Add Texture
- Stir in chopped nuts like pecans, walnuts, or peanuts into the brownie batter for added crunch. You can also sprinkle crushed nuts on top of the ganache for decoration and texture.
- Flavor Boost
- Incorporate additional flavors into the layers:
- Peanut Butter Layer: Mix in a splash of maple syrup or honey for a natural sweetener and flavor enhancement.
- Chocolate Ganache: Add a teaspoon of orange zest or a pinch of cinnamon for a subtle flavor boost.
- Incorporate additional flavors into the layers:
- Themed Brownies
- Customize the topping for different occasions. Add sprinkles for festive holidays, or drizzle melted white chocolate for an elegant touch.
Dietary Considerations
- Gluten-Free Option
- Replace regular all-purpose flour with a 1:1 gluten-free flour blend to make the brownies gluten-friendly. These blends are designed to work seamlessly in recipes, maintaining the same texture and structure as traditional flour. Ensure other ingredients, like cocoa powder, are certified gluten-free to avoid cross-contamination.
- Vegan Adaptation
- Replace dairy butter with a plant-based butter substitute in all layers.
- Use flax eggs as a substitute for regular eggs in the brownie batter. To make flax eggs, mix 1 tablespoon of ground flaxseed with 3 tablespoons of water for each egg required. Let the mixture sit for 5 minutes until it thickens.
- Opt for dairy-free chocolate chips and plant-based milk (such as almond, soy, or oat milk) to ensure the entire recipe is vegan-friendly.
- Lower Sugar Option
- Use a natural sugar substitute like stevia or monk fruit in place of granulated sugar to reduce the overall sweetness. For the peanut butter layer, replace powdered sugar with a blend of powdered erythritol or another low-calorie sweetener.
- Allergy-Friendly Alternatives
- For nut-free brownies, substitute the peanut butter with sunflower seed butter to cater to those with nut allergies. Be sure to check the labels to ensure the product is allergen-free.
These variations and dietary adaptations make it easy to customize buckeye brownies for various preferences and dietary needs without compromising their delicious flavor and texture.
Serving and Storage Tips

Serving Suggestions
- Cutting Clean Slices
- For perfectly neat slices, use a sharp knife dipped in warm water. Wipe the blade clean between each cut to prevent layers from smudging together.
- Presentation Ideas
- Dust with powdered sugar: Sprinkle a light layer over the ganache for a simple, elegant touch.
- Pair with vanilla ice cream: Serve a square of buckeye brownies alongside a scoop of vanilla ice cream for an indulgent dessert that balances warm and cold textures.
- Garnish with extras: Add a sprinkle of chopped peanuts or drizzle melted chocolate over the top to enhance visual appeal and flavor. This also adds a bit of crunch to complement the creamy and fudgy layers.
Storage Instructions
- Refrigerator
- Store the brownies in an airtight container to preserve their freshness and prevent them from absorbing odors in the fridge. They will stay fresh for up to 1 week.
- Before serving, let the brownies sit at room temperature for about 15–20 minutes to restore their soft texture and enhance the flavors.
- Freezer
- For longer storage, wrap individual brownie slices tightly in plastic wrap to protect them from freezer burn. Then place the wrapped brownies into a freezer-safe bag or container.
- Brownies can be frozen for up to 3 months. To serve, thaw them in the refrigerator overnight or at room temperature for a few hours.
Whether enjoyed fresh or frozen, these storage and serving tips ensure your buckeye brownies remain delicious, beautifully presented, and ready to impress whenever you’re ready to indulge!
Nutritional Information
Approximate Nutritional Breakdown (Per Serving)

