

Indulge in the rich, velvety goodness of homemade hot cocoa – a luxurious and comforting beverage that warms the soul. Crafting your own hot chocolate from scratch allows you to savor the depth of flavor and control the ingredients, creating a superior drinking experience compared to store-bought mixes. Whether you’re seeking a moment of indulgence on a chilly day or a special treat to share with loved ones, this creamy homemade hot cocoa will become your go-to comfort drink.
Key Takeaways
- Homemade hot cocoa offers a rich, creamy, and customizable experience compared to commercial mixes.
- Natural cocoa ingredients provide health benefits beyond the indulgence.
- Making hot chocolate at home is more cost-effective and environmentally friendly.
- Proper ingredient selection and preparation techniques ensure a perfectly smooth and balanced beverage.
- Endless flavor possibilities allow you to create your signature hot chocolate experience.
Why Homemade Hot Cocoa Beats Store-Bought Mixes

When it comes to satisfying that craving for a rich, velvety hot chocolate, homemade versions are the clear winners over store-bought mixes. From the health benefits of natural cocoa ingredients to the cost savings and eco-friendly advantages, the homemade approach offers an array of compelling reasons to forgo the commercial alternatives.
Health Benefits of Natural Cocoa Ingredients
Homemade hot chocolate allows you to control the quality and purity of the ingredients, ensuring you reap the full health benefits of cocoa. Unlike many commercial mixes laden with artificial additives, preservatives, and refined sugars, homemade hot cocoa harnesses the antioxidants, fiber, and essential minerals found in real cocoa powder. This translates to a more nutritious and guilt-free indulgence.
Cost Comparison: Homemade vs. Commercial
| Item | Homemade | Commercial Mix |
|---|---|---|
| Cocoa Powder (per serving) | $0.25 | $0.50 |
| Milk (per serving) | $0.20 | $0.30 |
| Sugar (per serving) | $0.05 | Included in mix |
| Total Cost per Serving | $0.50 | $0.80 |
The numbers speak for themselves – homemade hot chocolate is a far more cost-effective option compared to store-bought mixes. With just a few simple ingredients, you can enjoy a delicious and satisfying beverage at a fraction of the commercial price.
Environmental Impact of Making Your Own
When you make hot cocoa at home, you eliminate the need for excessive packaging and transportation associated with commercial products. This results in a significantly lower carbon footprint, making it an eco-friendly beverage choice. By skipping the store-bought mixes, you can enjoy your hot chocolate guilt-free, knowing you’re supporting sustainable practices.
In short, the advantages of homemade hot cocoa are undeniable. From the health benefits of natural ingredients to the cost savings and reduced environmental impact, the homemade approach clearly stands out as the superior choice over commercially produced mixes. Furthermore, by opting for the homemade route, you can indulge in a cozy, guilt-free cup of hot chocolate while taking pride in your choice to prioritize quality and sustainability.
Essential Ingredients for Perfect Creamy Homemade Hot Cocoa
Creating a rich, creamy, and comforting homemade hot cocoa starts with the right blend of ingredients. To craft the ultimate mug of hot chocolate, you’ll need a few key elements that work together harmoniously. Let’s dive into the essential components that make homemade hot cocoa truly special.
High-Quality Cocoa Powder
The foundation of any great hot cocoa is the cocoa powder. Look for a high-quality, unsweetened cocoa powder that is dark, rich, and intense in flavor. Avoid Dutch-processed cocoa, as it has a milder taste and won’t give you that deep chocolate profile. Opt for a premium natural cocoa powder for maximum cocoa powder quality.
Chocolate Chunks or Chips
While cocoa powder provides the chocolate essence, adding chopped dark, milk, or semi-sweet chocolate to the mix takes the creaminess and flavor to new heights. The chocolate melts and blends seamlessly with the other hot cocoa ingredients, resulting in a luxuriously smooth and indulgent hot chocolate.
Milk of Choice
The type of milk you select can greatly impact the best milk for hot chocolate. Traditional hot cocoa calls for whole milk, as its higher fat content lends a richer, creamier texture. However, you can also experiment with plant-based milk alternatives like almond, oat, or cashew milk for a dairy-free twist.
Sweetener
To balance the bitterness of the cocoa, a touch of sweetener is essential. Opt for pure cane sugar, maple syrup, or honey to sweeten your homemade hot cocoa to your desired taste preference.
With these essential elements – high-quality cocoa powder, chocolate, milk, and sweetener – you’re well on your way to crafting the perfect creamy homemade hot cocoa. Experiment with different combinations and proportions to find your signature recipe.
Choosing the Best Chocolate for Your Hot Cocoa
When it comes to crafting the perfect homemade hot cocoa, the type of chocolate you choose can make all the difference. From rich and intense dark chocolate to creamy milk chocolate and the balance of semi-sweet, each variety offers a unique flavor profile that can elevate your cozy cup of comfort.
Dark vs. Milk vs. Semi-Sweet Chocolate
Dark chocolate, with its high cocoa content, provides a deep, complex flavor that is often described as slightly bitter or earthy. Milk chocolate, on the other hand, is smoother and creamier, with a sweeter taste. Semi-sweet chocolate strikes a middle ground, blending the robust cocoa notes with a touch of sweetness. Consider your personal preferences and the desired intensity of your hot cocoa when choosing between these options.
Cocoa Powder Quality Guidelines
- Look for high-quality, unsweetened cocoa powder for the best results. Avoid powders that contain added sugars or other fillers.
- Opt for Dutch-processed cocoa powder, which has been treated with an alkali to reduce bitterness and enhance the chocolate flavor.
- For a richer, more indulgent hot cocoa, seek out premium, artisanal cocoa powders that are often made from single-origin beans.
Organic and Fair Trade Options
Conscious consumers seeking the best chocolate for hot cocoa may also want to consider organic and fair trade options. These ethically sourced chocolates and cocoa powders not only provide a superior flavor but also support sustainable farming practices and improve the livelihoods of the farmers who grow these precious ingredients.
The Ultimate Guide to Milk Selection for Hot Chocolate
When it comes to creating the perfect creamy hot cocoa, the type of milk you choose can make all the difference. From classic whole milk to dairy-free alternatives, each option brings its own unique flavor and texture to the mix. Whether you’re a fan of rich, indulgent hot chocolate or seeking a lighter, healthier version, this guide will help you navigate the world of milk selection and find the best fit for your hot cocoa cravings.
Whole Milk: The Traditional Choice
For many, whole milk is the go-to option for hot chocolate, and for good reason. Its creamy texture and full-bodied flavor perfectly complement the rich taste of cocoa, resulting in a cozy, comforting sip. Whole milk also adds a luxurious mouthfeel, making your homemade hot cocoa feel like a decadent treat.
Skim Milk: A Lighter Alternative
If you’re looking to cut back on calories and fat, skim milk can be a great choice for your hot chocolate. While it may not offer the same velvety texture as whole milk, skim milk can still deliver a satisfying hot cocoa experience, especially when combined with high-quality cocoa powder and a touch of sweetener.
Dairy-Free Milk Alternatives
For individuals with dietary restrictions or personal preferences, there is a wide array of dairy-free milk alternatives that work wonderfully in hot chocolate. Options such as almond milk, oat milk, coconut milk, and soy milk offer a variety of plant-based choices that provide a creamy and delicious base for homemade hot cocoa. Additionally, experimenting with these different varieties allows you to discover the one that best complements your taste preferences and enhances your enjoyment.
| Milk Type | Taste Profile | Texture | Nutritional Benefits |
|---|---|---|---|
| Whole Milk | Rich, creamy, and indulgent | Thick and velvety | High in protein and calcium |
| Skim Milk | Lighter and more subtle | Thinner and less creamy | Low in fat and calories |
| Almond Milk | Nutty and slightly sweet | Smooth and creamy | Low in calories and high in vitamin E |
| Oat Milk | Subtle and slightly sweet | Thick and creamy | High in fiber and low in fat |
| Coconut Milk | Tropical and mildly sweet | Rich and creamy | High in healthy fats and low in carbs |
When selecting the best milk for your hot chocolate, consider your personal preferences, dietary needs, and the overall flavor profile you’re aiming for. Experiment with different options to find the perfect match for your creamy hot cocoa creations.
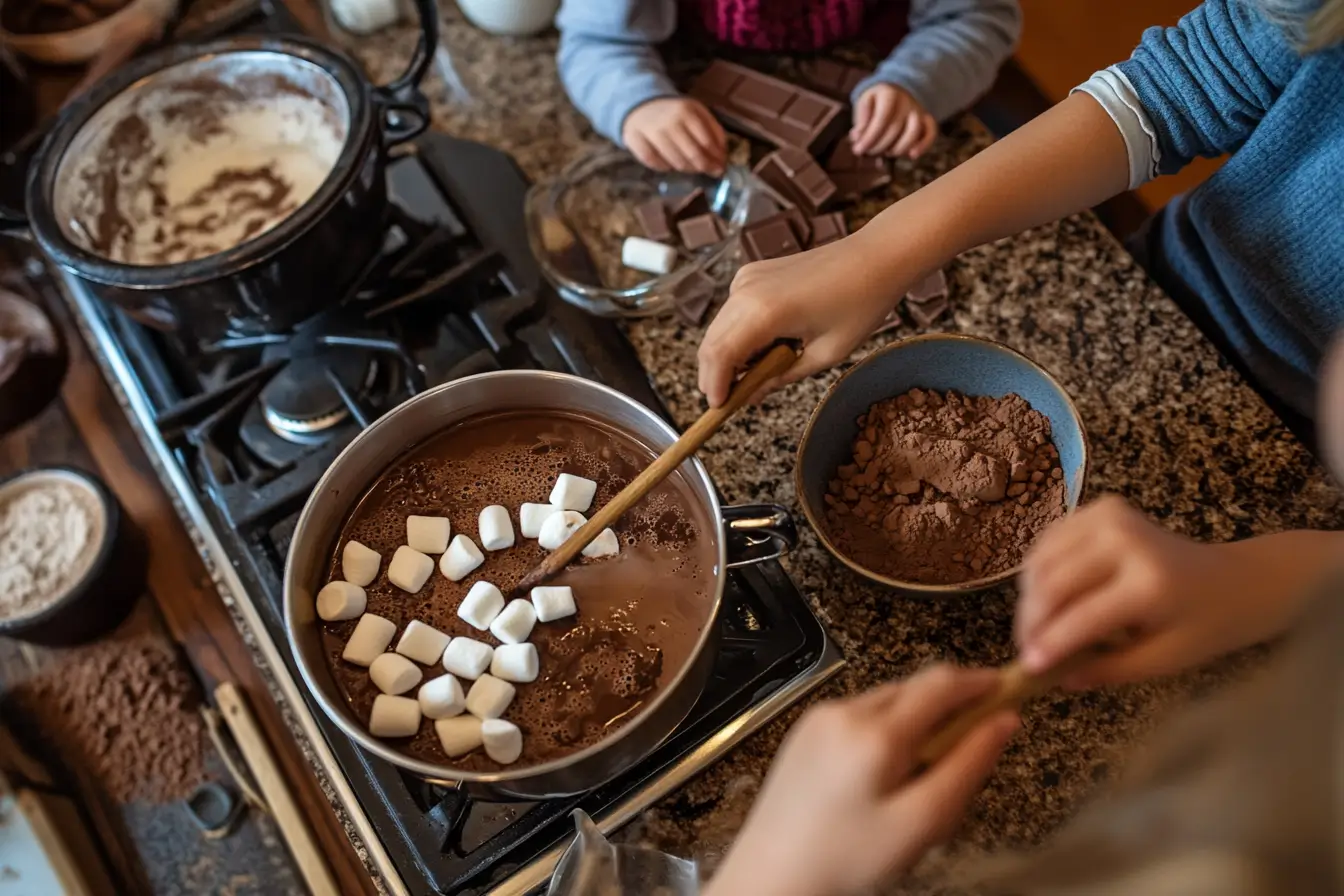
Step-by-Step Hot Cocoa Making Process
Preparing a rich, creamy homemade hot cocoa is a straightforward process that delivers unparalleled results. By following a few simple steps, you can craft a smooth hot chocolate recipe that will warm your soul and impress your taste buds.
Temperature Control Tips
Achieving the perfect temperature is crucial for a well-crafted hot cocoa. Start by heating your milk or milk alternative of choice over medium heat, being mindful not to let it boil. The ideal temperature range is between 160°F and 180°F, as this will ensure the cocoa powder and chocolate melt seamlessly without burning or scorching the mixture.
Mixing Techniques for Optimal Smoothness
- Whisk the cocoa powder and a small amount of the heated milk together until a smooth, lump-free paste forms.
- Gradually add the remaining milk, whisking continuously to incorporate the cocoa paste thoroughly.
- For an extra-silky texture, use a milk frother or hand mixer to aerate the hot cocoa, creating a delightful frothy top.
Preventing Common Preparation Mistakes
- Avoid overcrowding the pot – use a saucepan that allows for ample room to whisk and stir the mixture.
- Don’t let the milk boil – this can cause the cocoa to curdle and result in a grainy, unappetizing texture.
- Stir continuously – constant agitation is key to preventing the formation of unsightly lumps.
By following these step-by-step tips, you’ll be well on your way to crafting the perfect, smooth hot chocolate recipe that will delight your senses and warm your soul.
Creative Hot Cocoa Flavor Enhancements

Elevate your homemade hot cocoa experience with a variety of delightful flavor additions. Beyond the classic chocolate taste, there are endless possibilities to enhance your cozy beverage and cater to diverse taste preferences.
Start by exploring the world of hot cocoa flavor ideas. One simple way to add depth is by incorporating a touch of spice. Try stirring in a pinch of cinnamon, nutmeg, or even a dash of chili powder for a subtle warmth. Vanilla extract is another classic that can lend a rich, aromatic note to your hot chocolate.
For those with a sweet tooth, consider adding a drizzle of caramel, a sprinkle of crushed peppermint, or a spoonful of hazelnut spread. Seasonal flavors like pumpkin spice, peppermint, or gingerbread can also make for truly festive and indulgent hot cocoa creations.
- Cinnamon
- Nutmeg
- Chili powder
- Vanilla extract
- Caramel
- Crushed peppermint
- Hazelnut spread
- Pumpkin spice
- Gingerbread
Don’t be afraid to get creative and experiment with unique spices for hot chocolate or other mix-in ingredients. The possibilities are endless when it comes to customizing your homemade hot cocoa and discovering new what can I add to hot cocoa to make it better flavor combinations.
Topping Ideas to Elevate Your Hot Cocoa
Elevating your homemade hot cocoa is as simple as adding a few delightful toppings. From classic homemade whipped cream to creative garnish combinations, the options are endless for transforming your cozy mug into a true indulgence.
Homemade Whipped Cream Techniques
One of the most popular hot cocoa toppings is a dollop of rich, homemade whipped cream. To make your own, simply chill a metal bowl and beaters in the refrigerator for 30 minutes. Then, add heavy whipping cream and whip on high speed until soft peaks form. Gently fold in a touch of powdered sugar or vanilla extract for added flavor.
Garnish Combinations for Different Occasions
- For a decadent winter treat, top your hot chocolate with a sprinkle of crushed peppermint candy and a dusting of cocoa powder.
- Celebrate the holidays by garnishing with mini marshmallows, a drizzle of caramel sauce, and a sprinkle of cinnamon.
- Embrace the changing seasons with a topping of toasted coconut, chopped nuts, and a pinch of nutmeg for a cozy autumn vibe.
- Welcome spring with a fresh twist, adding chopped fresh strawberries, a sprinkle of powdered sugar, and a sprig of mint.
The possibilities for hot cocoa toppings are endless, allowing you to customize your drink and make it truly your own. Experiment with different flavor combinations to discover new favorites and impress your friends and family.
Serving and Storage Tips for Hot Cocoa
Elevating your homemade hot cocoa experience doesn’t end with the perfect recipe. Proper serving and storage techniques can make all the difference in preserving the rich, creamy goodness of this cozy winter delight. Let’s explore some practical tips to help you serve and store your homemade hot chocolate like a pro.
Serving Suggestions
When it comes to serving hot cocoa, the mug you choose can have a significant impact on the overall experience. Opt for sturdy, heat-resistant mugs that will keep your beverage warm for longer. For a touch of elegance, consider using vintage-inspired or specialty mugs that add a personal flair to your presentation.
Maintaining the ideal temperature is crucial for enjoying hot cocoa at its best. Serve your freshly prepared drink immediately, or keep it warm on the stove over low heat, stirring occasionally to prevent a skin from forming. If you prefer to serve it in batches, consider investing in a hot beverage dispenser to ensure consistent temperature and convenience.
Storing and Reheating Leftovers
If you have any leftover homemade hot chocolate, proper storage is key to preserving its flavor and texture. Transfer the cooled drink to an airtight container and refrigerate for up to 4 days. When you’re ready to enjoy it again, simply reheat the hot cocoa on the stove over medium heat, stirring frequently until it reaches your desired temperature. Avoid microwaving, as this can lead to uneven heating and potential scorching.
For larger gatherings or events, consider making hot cocoa in advance and storing it in the refrigerator. When it’s time to serve, simply reheat the desired amount, following the same stove-top method to ensure a smooth, creamy consistency.
By mastering the art of properly serving and storing your homemade hot chocolate, you can continue to savor the rich and comforting flavors of this beloved winter staple for days to come. Take full advantage of creative serving ideas for cozy hot cocoa, efficient techniques for storing homemade hot chocolate, and simple methods for reheating it to ensure every sip is as delightful as the first!
Troubleshooting Common Hot Cocoa Problems
Crafting the perfect creamy, rich hot cocoa can sometimes pose a few challenges. But no need to worry – we’ve got your back! Let’s dive into some common issues and how to easily fix them, so you can savor a delightful cup of homemade hot chocolate every time.
Fixing Lumpy Texture
Nothing ruins the experience of hot cocoa more than an unpleasant, grainy texture. The culprit is usually improper mixing technique or using the wrong type of cocoa powder. To smooth out those pesky lumps, try these tips:
- Whisk the cocoa powder vigorously with a small amount of milk or water before adding it to the heated milk. This helps prevent clumping.
- Use a high-quality, finely ground cocoa powder, which will disperse more easily.
- Strain the hot cocoa mixture through a fine-mesh sieve before serving to remove any remaining lumps.
Adjusting Sweetness Levels
The right balance of sweetness is crucial for an enjoyable hot cocoa experience. If your batch turns out too sweet, try these easy fixes:
- Dilute the mixture by adding more milk or water to your cup.
- Reduce the amount of sweetener, such as sugar or honey, in the recipe.
- Add a pinch of salt to help balance the sweetness and enhance the chocolate flavor.
On the other hand, if your hot cocoa needs a touch more sweetness, simply stir in a bit more sugar, honey, or your preferred sweetener until you reach the desired taste.

Homemade Hot Cocoa
Ingredients
- 2 tablespoons unsweetened cocoa powder Preferably high-quality natural cocoa powder
- 2 tablespoons granulated sugar Adjust based on sweetness preference
- 1 pinch salt Enhances chocolate flavor
- 1 cup whole milk Can substitute with plant-based alternatives
- ½ cup water Helps dissolve cocoa and sugar
- ¼ teaspoon pure vanilla extract Optional, for extra depth of flavor
- ¼ cup chopped dark chocolate or chocolate chips For a richer, creamier hot cocoa
- ¼ teaspoon ground cinnamon Optional, for a warm spiced flavor
- 2 tablespoons whipped cream Optional, for topping
- 1 tablespoon chocolate shavings or cocoa powder Optional, for garnish
Instructions
- In a small saucepan, whisk together cocoa powder, sugar, salt, and water over medium heat until smooth.
- Slowly add milk while continuously stirring to avoid lumps.
- Heat the mixture until steaming but not boiling, stirring occasionally.
- Remove from heat and stir in vanilla extract and chopped chocolate until melted and fully incorporated.
- Pour into mugs and top with whipped cream, chocolate shavings, or a sprinkle of cinnamon if desired.
- Serve immediately and enjoy your rich, homemade hot cocoa.
Notes
Nutrition
Conclusion
As we’ve explored, creating the perfect homemade hot cocoa can be a rewarding and customizable experience. From selecting the finest chocolate and milk to perfecting the preparation techniques, the journey to crafting your cozy comfort drink is both delightful and satisfying.
The benefits of making hot chocolate from scratch are numerous – you’ll enjoy superior taste, the ability to adjust sweetness and flavors to your liking, and the satisfaction of creating a comforting beverage with natural, high-quality ingredients. Whether you prefer dark, milk, or semi-sweet chocolate, the options for crafting your ideal perfect homemade hot cocoa are endless.
We encourage you to explore various techniques and flavorful add-ins to craft your signature customizable hot chocolate recipe. By embracing the creative process, you can let your personal preferences guide you in creating the ultimate cozy comfort drink. This delightful beverage will not only warm your soul but also reflect your unique taste and style. Savor each sip and relish in the homemade goodness that sets this experience apart from store-bought mixes.
FAQ
What can I add to hot cocoa to make it better?
There are many delicious ingredients you can add to hot cocoa to enhance the flavor and make it even more indulgent. Some options include:
– Cinnamon, nutmeg, or other warm spices
– Peppermint extract or crushed peppermint candies
– Vanilla extract or vanilla bean
– Caramel sauce or chocolate syrup
– Whipped cream, marshmallows, or crushed cookies for toppings
– Milk alternatives like almond, oat, or coconut milk
Experiment with different flavor combinations to find your perfect cup of hot cocoa!
What kind of milk is best for Creamy Homemade Hot Cocoa?
The type of milk you use can significantly impact the taste and texture of your homemade hot chocolate. Here are some of the best milk options to consider:
– Whole milk: This provides a rich, creamy texture and full-bodied flavor.
– 2% or skim milk: These lighter milk choices result in a less heavy, but still smooth, hot chocolate.
– Almond, oat, or coconut milk: These plant-based milk alternatives offer dairy-free options that can create a delightfully creamy hot cocoa.
– Heavy cream: Adding a splash of rich, creamy heavy cream can elevate your hot chocolate, making it extra indulgent and luxuriously velvety in texture. When it comes to selecting the best milk for your hot chocolate, the ultimate decision depends entirely on your personal preferences and individual dietary needs. Consider trying out different options, such as traditional whole milk, dairy-free alternatives, or even specialty creamers, to discover what works best for creating your perfect, cozy cup of hot chocolate.
How do I make hot cocoa less bitter?
If your homemade hot cocoa tastes too bitter, there are a few things you can do to balance the flavors:
– Add more milk or cream to dilute the cocoa powder.
– Increase the amount of sweetener, such as sugar, honey, or maple syrup.
– Use a higher-quality cocoa powder, as some cheaper varieties can be more bitter.
– Try mixing in a small amount of vanilla extract or cinnamon, which can help offset bitterness.
– If the bitterness is from using dark chocolate, switch to a milder milk or semi-sweet chocolate.
Adjusting the ratios of your ingredients and experimenting with different flavor additions can help you achieve the perfect level of sweetness and richness in your hot cocoa.
Can I make hot cocoa with just cocoa powder and water?
Yes, you can certainly make hot cocoa using just cocoa powder and water, though the result may not be as rich and creamy as a version made with milk. Here’s how to do it:
– Whisk together 2-3 tablespoons of unsweetened cocoa powder and 1-2 tablespoons of sugar (or your preferred sweetener) in a mug.
– Slowly add in hot water, whisking continuously to prevent lumps.
– The ratio is typically 2 tablespoons of cocoa powder per 1 cup of water, but you can adjust to your taste preferences.
– For a creamier texture, you can substitute some of the water with warm milk.
This basic hot cocoa method is quick and easy, but using milk instead of water will result in a richer, more indulgent hot chocolate experience.
How do I make my hot cocoa extra creamy?
To achieve an extra creamy texture in your homemade hot cocoa, try these tips:
– Use whole milk or a combination of milk and heavy cream. The higher fat content creates a richer, creamier mouthfeel.
– Gently heat the milk on the stovetop, stirring frequently, until it’s steaming and just about to simmer. This helps develop the cocoa powder’s flavor.
– Whisk the cocoa powder and sugar (or sweetener) into the warm milk until fully dissolved and incorporated.
– For an extra-smooth consistency, use an immersion blender or regular blender to blend the hot cocoa mixture briefly.
– Top with homemade whipped cream or a dollop of mascarpone or crème fraîche for an indulgent finishing touch.
With a little attention to technique, you can create a wonderfully creamy and luxurious hot chocolate at home.